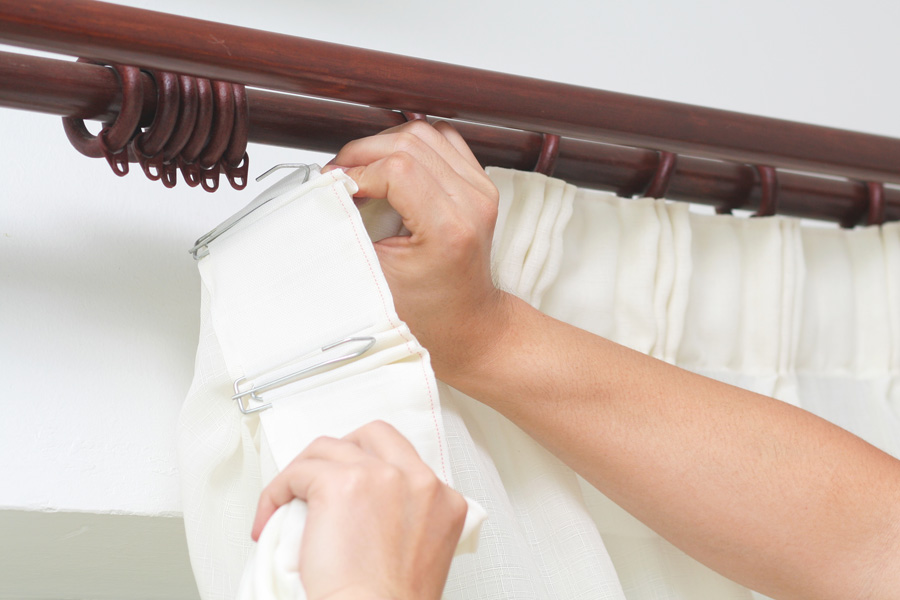
The following information is based on the hanging of curtains with a Pencil Pleat Heading.
Step 1
Wash your hands. This may sound obvious but it is surprising how often it is overlooked, particularly after handling dirty tools during the fitting of poles and tracks. The last thing you want are dirty marks on your fresh new curtains.
Step 2
Clear and clean a large open surface for which you are able to lay your curtains out, ideally the dining table or clean floor.
Step 3
Carefully remove your curtains from their packaging. Lay them out one at a time on your prepared surface.
Step 4
Check your curtains. Check both the length and width of each curtain. Check that the pattern, colour and design of one curtain matches the other. Check the quality of the stitching and finishing. You do not want to spend the time and effort hanging your curtains to step back in admiration and see that the patterns do not match or that one curtain is shorter than the other!
Note 1: It is likely that your curtains will be creased from the packaging. Do not worry, over time the weight of the hanging curtains will ensure that the creases drop out. However, should you wish to hurry the process along in some cases it is possible to lightly iron the underside of the curtain (side facing away from the room). But, always check with the label provided in the curtains first as not all fabrics respond suitably to ironing.
Note 2: Made to Measure Curtains do not contain a label so please consult with your supplier.
Step 5
Upon examining your curtains you will see that each curtain contains a strip of tape stitched along the heading. Within this strip you will see three strings. It is these strings that you will use to pull up the curtains to create that professional gathered look.
Step 6
Firstly, you need tie the three strings into a knot at one end of the curtain. This end will be the inner edge of your curtain. Generally, it does not matter which end you choose, however remember that whichever end you choose for one curtain you must choose the opposite end for the other curtain.
Note 1: Sometimes the strings are stitched down, in this instance this end becomes the inside edge or centre.
Note 2: If the curtains have a half width then it is the half width that goes to the outside of the window.
Step 7
Now you have securely tied off one end you are ready to pull up your curtains. You should be aiming to pull up each curtain to approximately half of the total width of your pole or track. (Leave an additional 2 cm’s to allow the curtains to overlap).
Note: The above is based upon the assumption that you are hanging two curtains to a window, if you are hanging more, or less, then adjust accordingly. For example 4 curtains would each be pulled up to a quarter of the total width of your pole or track.
In order to pull up your curtains gather the three strings in one hand. Clasp them tightly as close to the tape as possible. With your other hand gently slide the curtain down the strings approximately 15cm. Make sure you slide the curtain evenly down each of the three strings.
Release the three stings you are holding, reposition your hand as close to the curtain tape as possible, once again clasp the strings and with your other hand gently slide the curtain evenly down the strings another 15 cm.
Step 8
Once you believe you have gathered your curtains up to the correct width tie a slip knot in the remaining end.
Note: If you find that the curtains appear not to have gathered evenly, then do not worry, simply evenly space them out along the width of the curtain after you have tied off the slip knot.
Step 9
Hold your curtains up against the pole or track to check that you have reached the desired width. If your curtains are too short, release the slip knot, let the curtain tape slowly slide out to the desired width and re-do the slip knot. Gently slide the curtain up to meet the slip knot, ensuring that the gather remains even across the width of the curtain.
Step 10
Now that you have pulled up your curtains you will need to insert your curtain hooks. Pencil Tape Headings generally allow three different positions by which to insert your hooks. This allows you to adjust the height by which the bottom of your curtain hangs.
Note: It is advised that you insert approximately 5 hooks along the centre slot of the heading tape at the outer edge of your curtains. Hang the outer edge of your curtain up while supporting the rest of the curtain in your hands. Assess the height at which the bottom of your curtain is hanging. If you would like it to be lower, adjust to the top slot. If you would like it to hang higher, adjust to the bottom slot.
Step 11
It is best to insert a hook in 1 out of every 5 spaces (minimum), including one at either end. Therefore, you will need to count how many hooks you need and ensure there are exactly the same amount of rings, gliders or eyelets within your curtain track.
Step 12
Finally you are able to hang your curtains. Remember this is a two man operation, and will require a sturdy ladder. It is important that one person takes the weight of the curtain whilst the other is hanging to ensure that your pleats remain even.
Follow the above steps and we are sure your curtains will look as if they were hung by a professional. However, if you experience any difficulties or are unsure of the procedures described please do not hesitate to contact us.


